How to Install Windows 11 on Unsupported Hardware (Bypass TPM, Secure Boot, and RAM Check)
Windows 11 introduces stricter hardware requirements, including TPM 2.0, Secure Boot, and at least 4 GB of RAM. These checks block many older PCs from upgrading. However, for advanced users, there’s a safe and effective way to bypass these restrictions and complete the installation without modifying the ISO or using unofficial builds.
This tutorial will walk you through a fully legal registry-based bypass during the official Windows 11 setup. No external tools are required, and the process works with original ISO files downloaded directly from Microsoft.
1. The Error Message
If your PC lacks Secure Boot or TPM 2.0, the setup will fail with the following message:
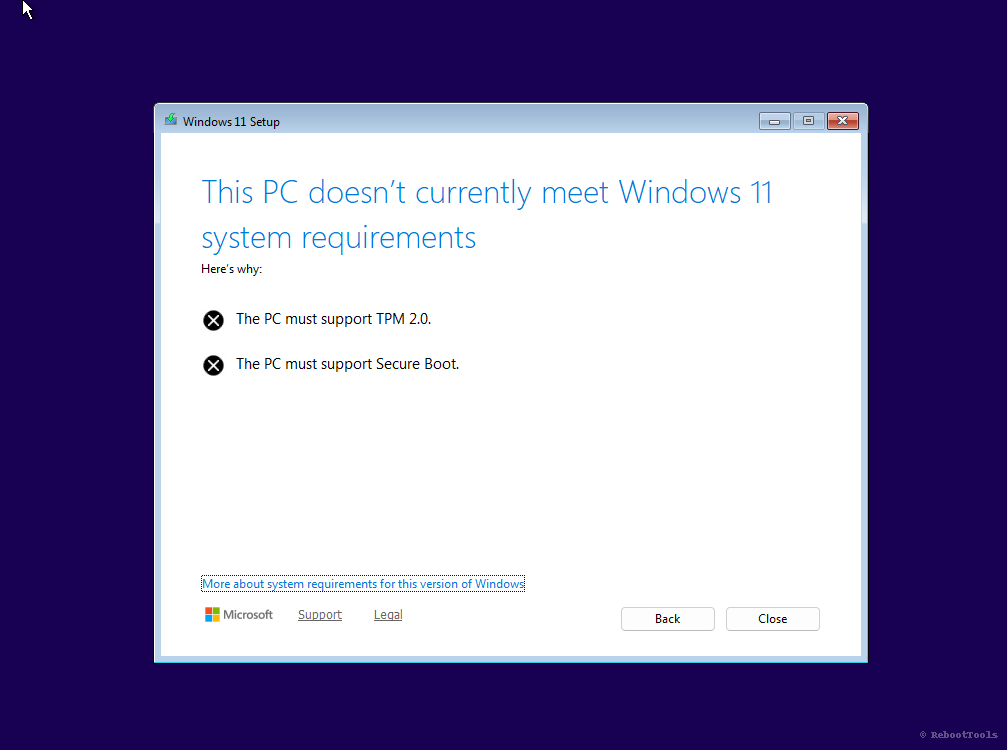
This screen informs you that your PC doesn’t meet minimum system requirements. Fortunately, these checks can be bypassed directly from within the setup environment.
2. Open Registry Editor (regedit)
Press Shift + F10 to open a command prompt. This shortcut works during Windows Setup and gives you temporary access to system tools.
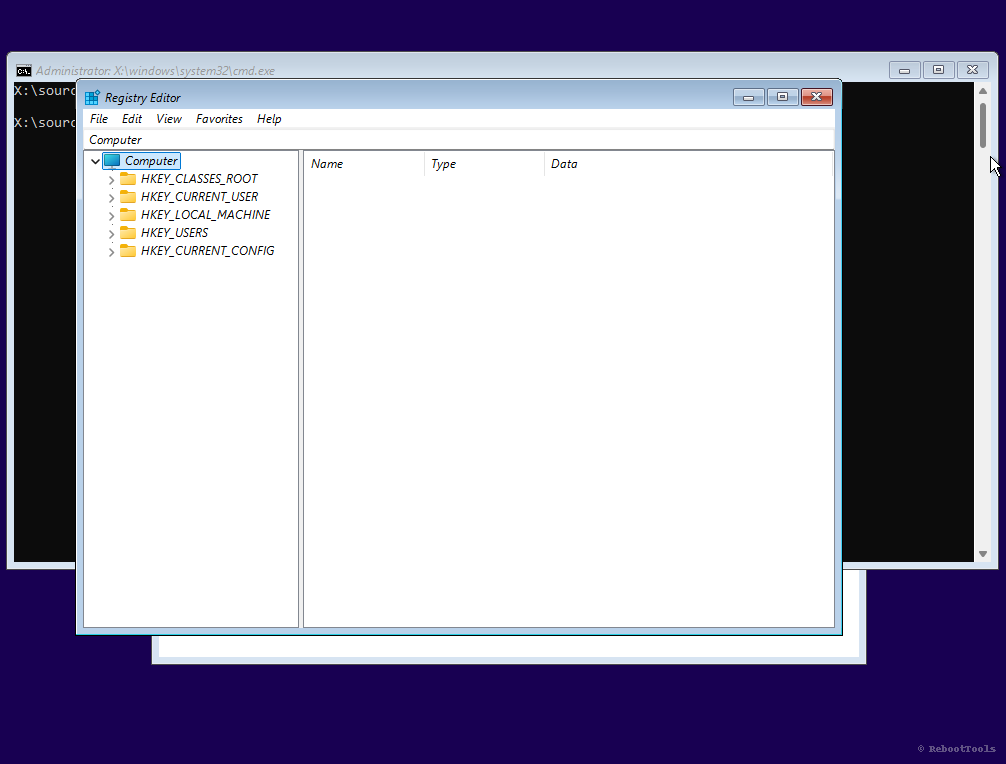
Then type regedit and press Enter to open the Registry Editor.
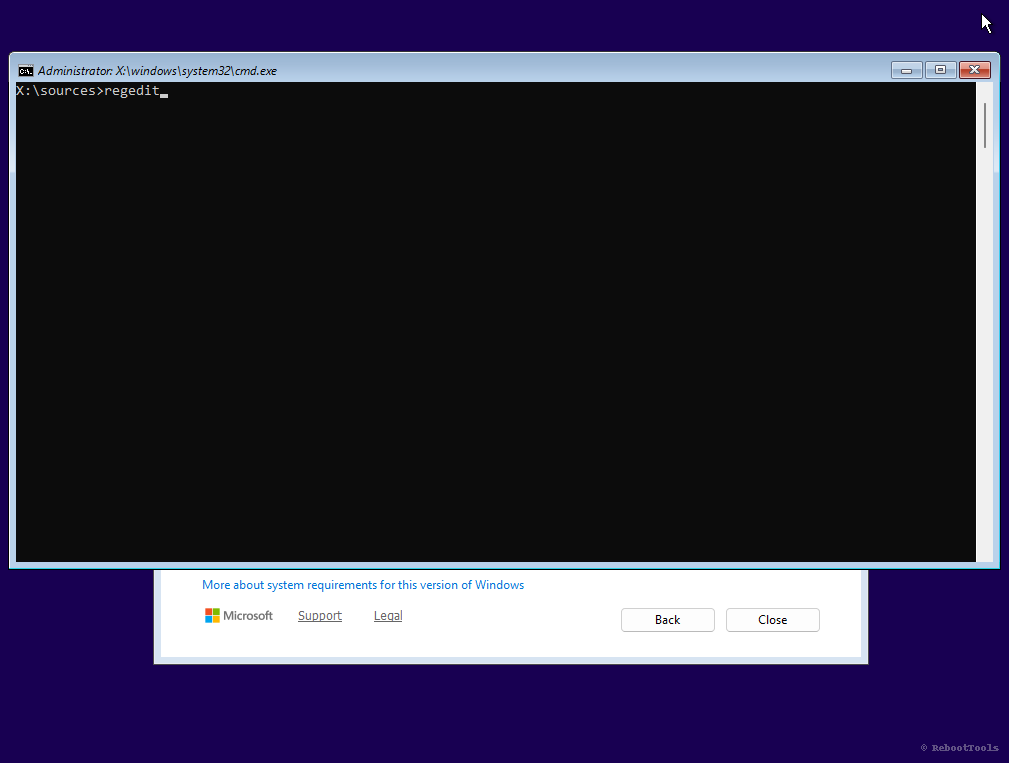
This tool allows you to modify Windows setup behavior by adding specific keys.
3. Navigate to Setup Key
In the Registry Editor, browse to:
HKEY_LOCAL_MACHINE\SYSTEM\Setup
This is where we’ll create a new key that tells the setup to skip certain hardware checks. This method is supported by Microsoft in official documentation for enterprise deployments.
4. Create the “LabConfig” Key
Right-click on Setup, select New → Key, and name it exactly:
LabConfig
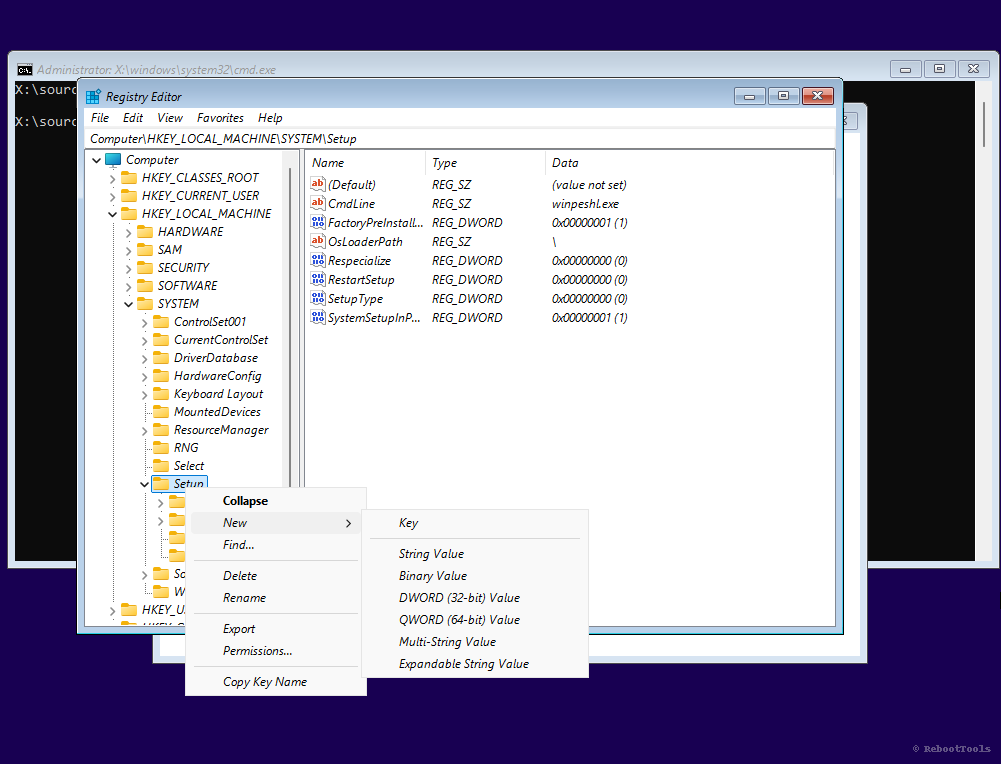
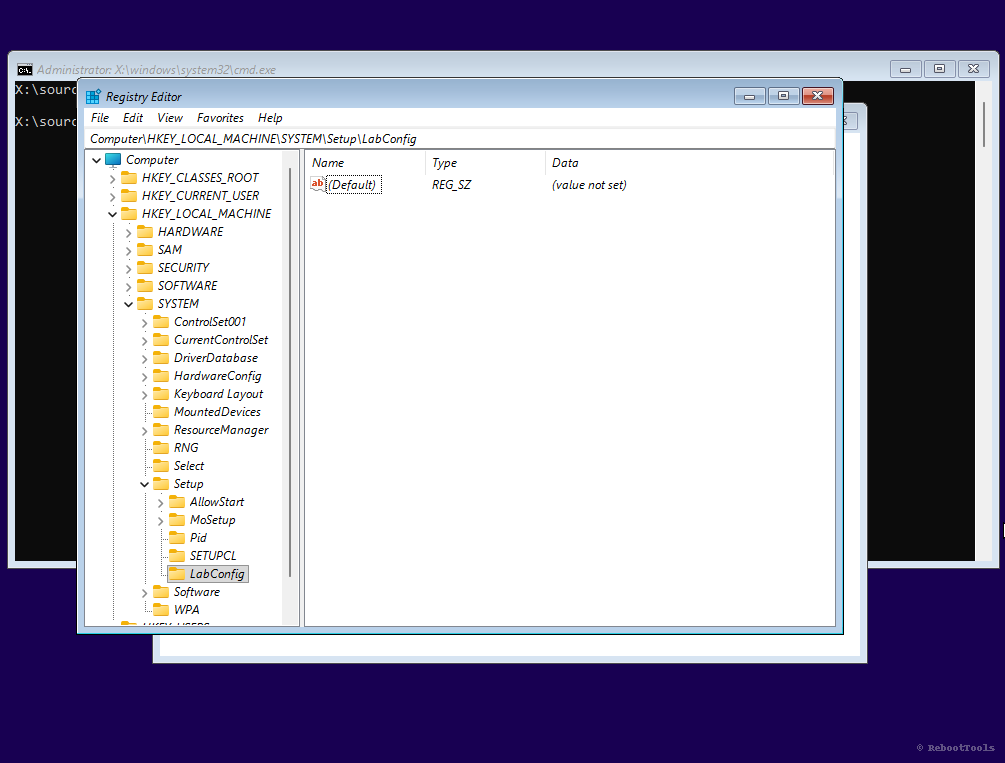
This key will store DWORD values that disable individual checks.
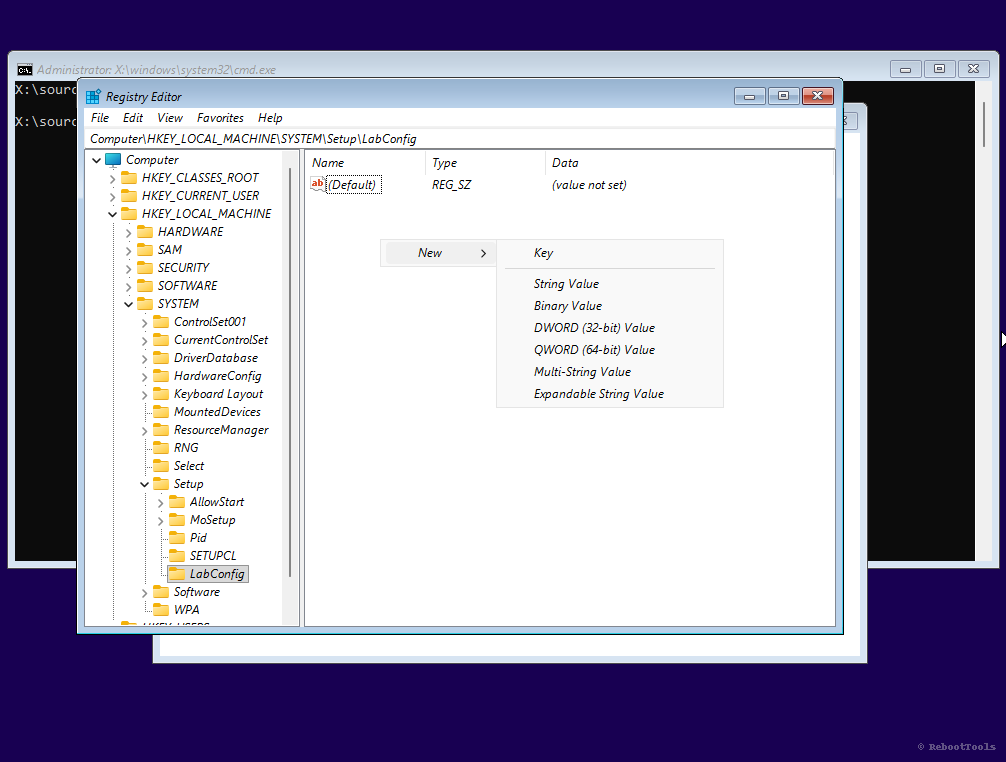
5. Create Bypass Values
Now, inside LabConfig, create the following DWORD (32-bit) values:
BypassTPMCheck→ set to 1BypassSecureBootCheck→ set to 1BypassRAMCheck→ set to 1
To do this, right-click in the right-hand pane, select New → DWORD (32-bit) Value, and name each value exactly as shown above.
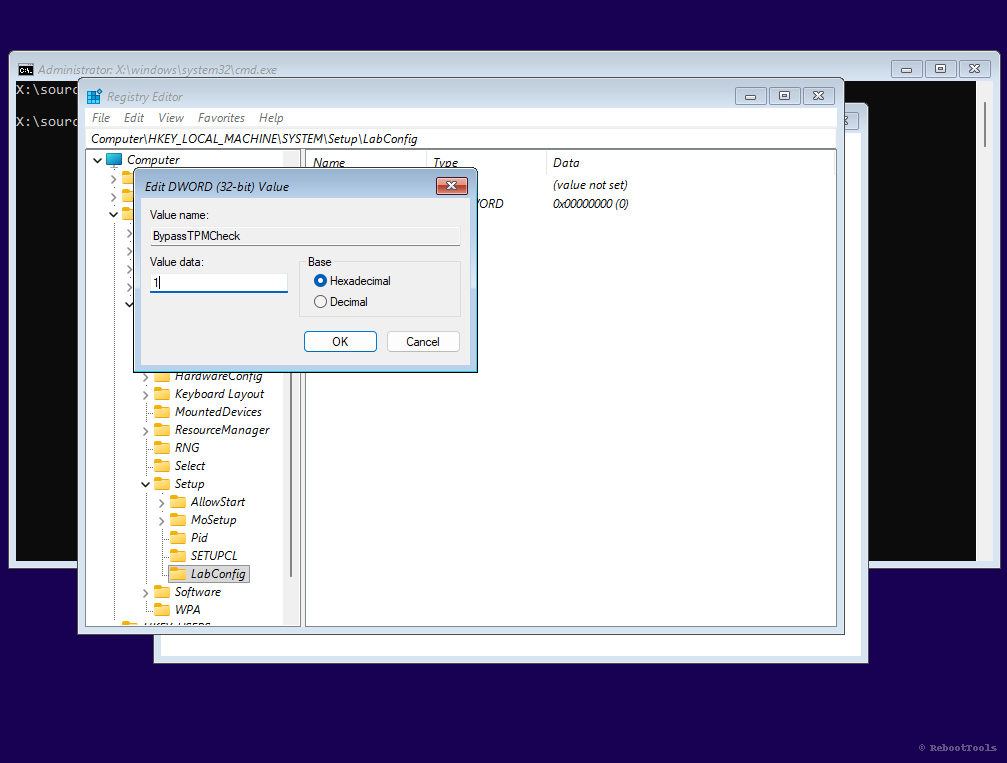
After creating each value, double-click it to open the edit window. Set the Value data to 1, leave the base as Hexadecimal, and click OK.
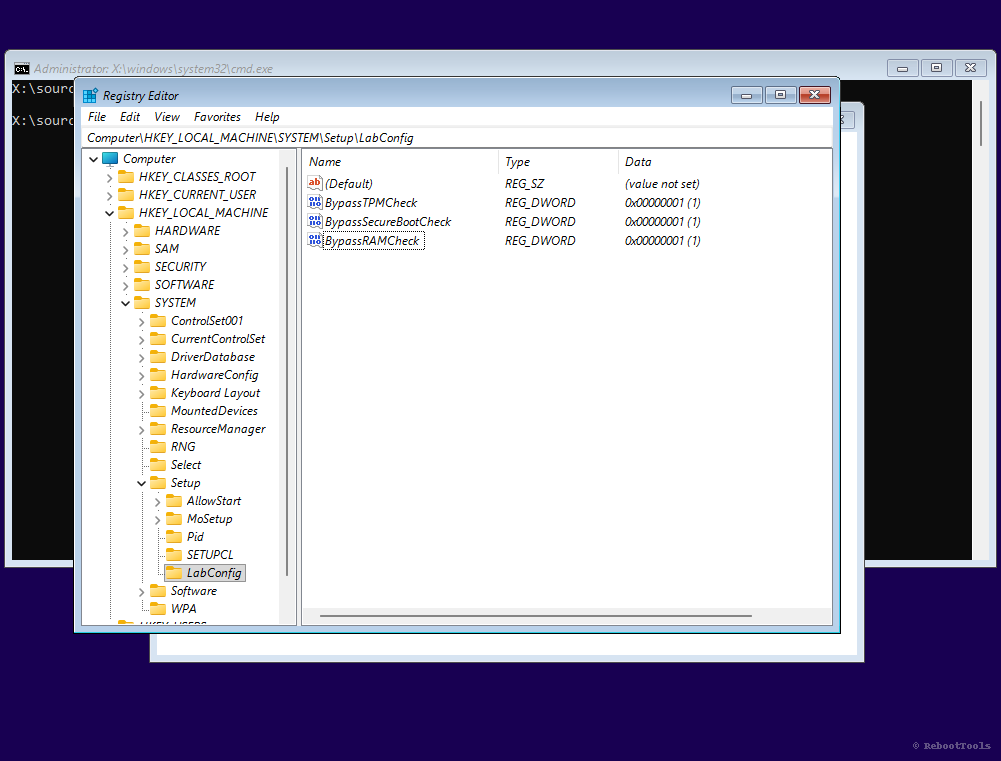
These values directly disable the checks during setup. Once they are in place, you can proceed normally.
6. Resume Installation
Close Registry Editor and Command Prompt. Then go back in setup and click Next again. You’ll notice that the system no longer blocks installation.
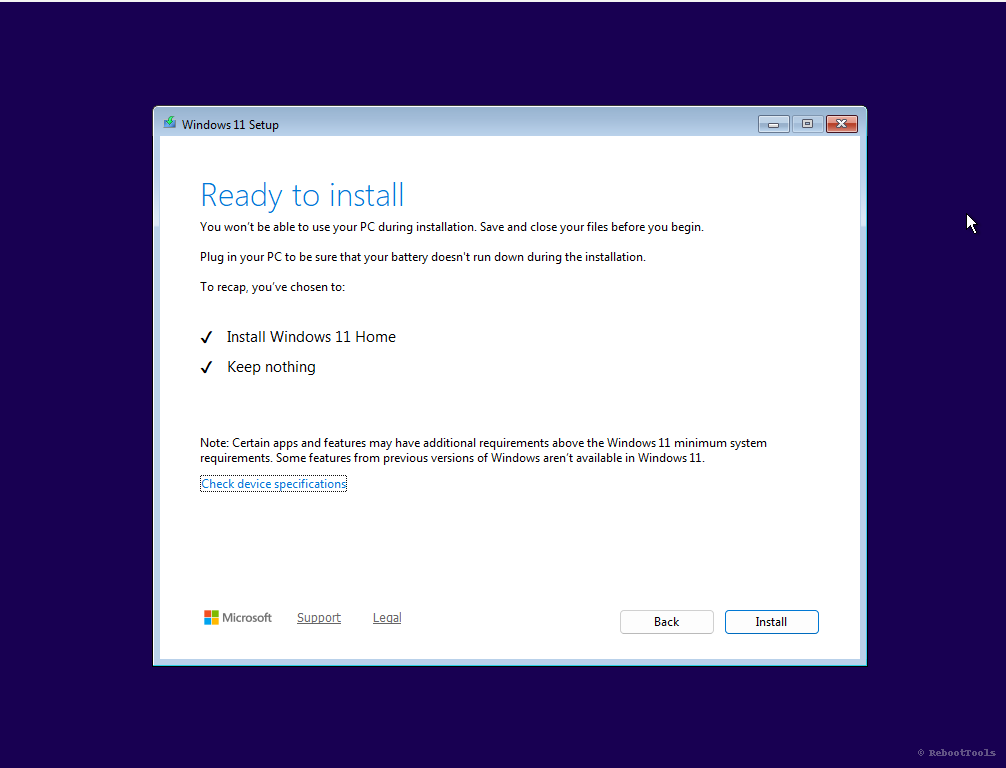
From here, installation proceeds exactly as usual. You can choose to upgrade or clean install.
7. Installation in Progress
Setup will copy files and restart your PC multiple times. Be patient — this phase may take up to 30 minutes depending on your hardware.

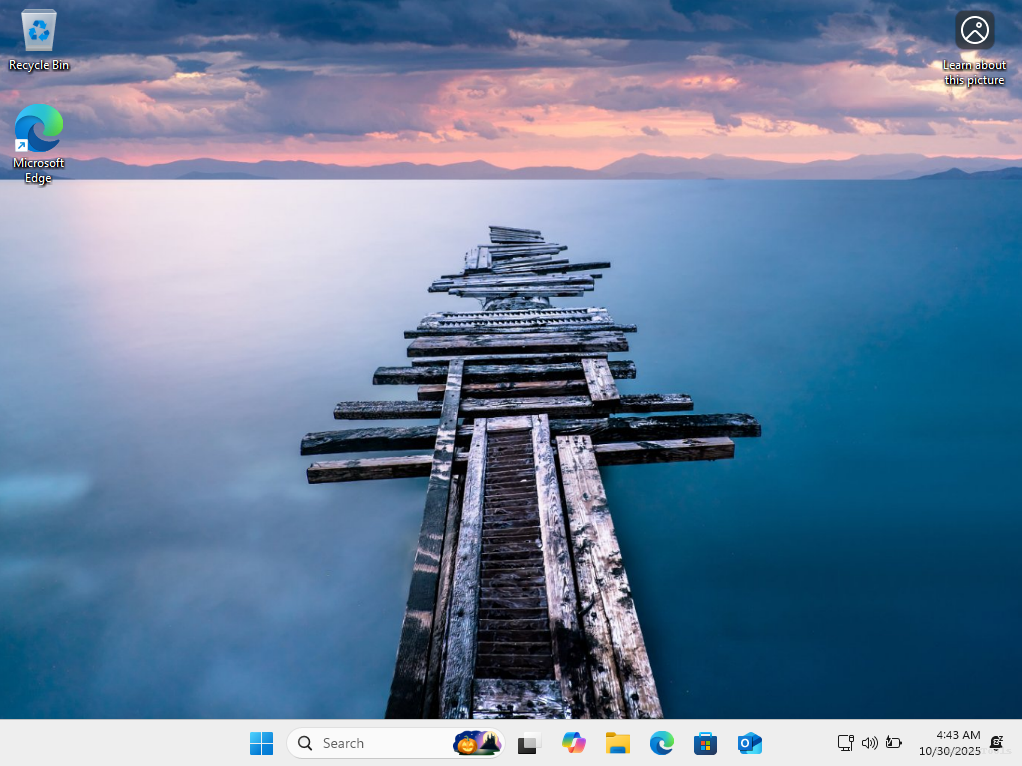
8. Windows 11 Successfully Installed
After setup completes, you will land on a clean Windows 11 desktop. You now have a fully functional system on hardware that was previously blocked.
Note: Although you bypassed the requirements, you will still receive updates normally, including security patches and driver support.
Next Steps
- Install missing drivers and check for updates in Windows Update
- Activate Windows using a valid product key
- Customize privacy and telemetry settings
- Use Rufus or Ventoy to create additional bootable tools
Frequently Asked Questions
Will I still receive Windows updates?
Yes. As of now, Microsoft allows unsupported devices to receive feature and security updates. However, this could change in future builds, so it’s recommended to stay current with patches.
Is bypassing TPM and Secure Boot legal?
Yes. You are not modifying or cracking Windows — you are only changing setup behavior using a supported registry tweak. Microsoft even documents this for IT professionals.
Will Secure Boot or TPM remain off after installation?
No. The bypass only affects the installation process. If your system supports TPM or Secure Boot, you can re-enable them later in BIOS/UEFI.
Can I use this method with all Windows 11 versions?
Yes. This method works with Home, Pro, and Enterprise editions, as long as the setup is launched from a standard ISO image or USB installer.