Install and Configure OpenConnect GUI VPN on Windows
This step-by-step guide explains how to install and configure OpenConnect GUI VPN on Windows. Each step is illustrated with real screenshots and focuses on a stable, predictable setup suitable for corporate VPNs, Cisco AnyConnect–compatible servers, and environments using certificates or MFA.
Before you start: download the latest installer from our OpenConnect GUI program page . This guide assumes you already have valid VPN credentials provided by your administrator.
What Is OpenConnect GUI Used For?
OpenConnect GUI is a Windows client for OpenConnect VPN, commonly used as an open-source alternative to proprietary clients such as Cisco AnyConnect. It is widely deployed in corporate, academic, and enterprise environments where secure remote access is required.
Typical use cases include:
- Connecting to corporate VPN gateways
- Remote access to internal networks and resources
- VPN connections protected by certificates or multi-factor authentication
- Replacing closed-source VPN clients with an open alternative
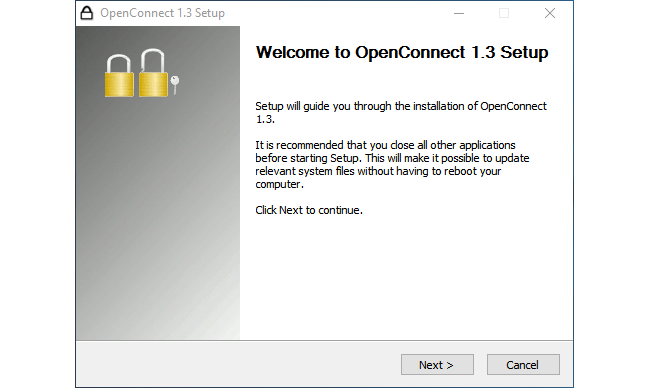
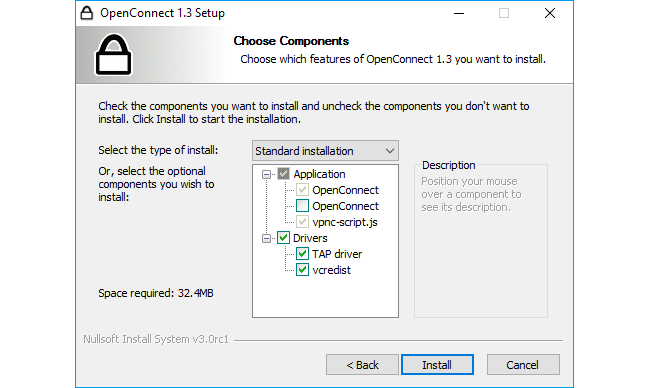
Installation
- Run the OpenConnect GUI installer and follow the setup wizard.
- Choose installation components. In most cases, default options are recommended unless your IT administrator specifies otherwise.
Configuring and Connecting
- Launch OpenConnect GUI from the Start Menu.

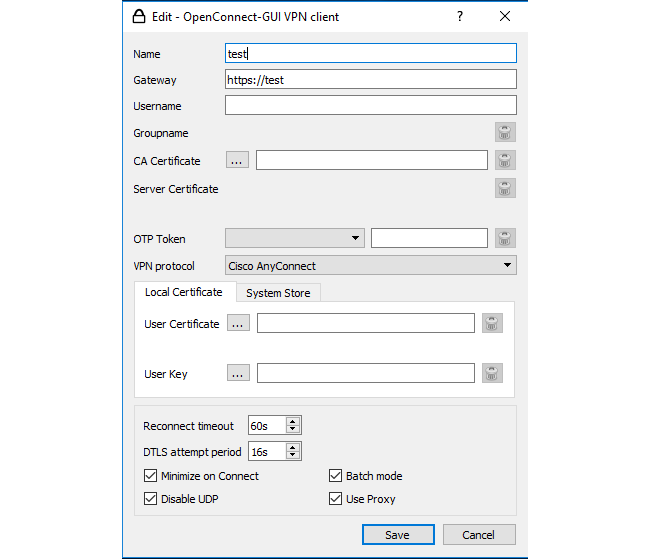
- Create a new VPN profile and enter the VPN server address provided by your organization.
- Edit the profile and configure authentication options such as username, certificates, or token-based login.

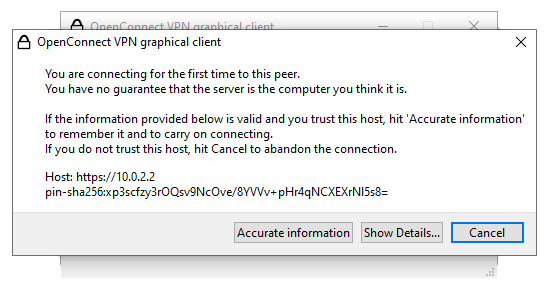
- When connecting for the first time, review and accept the server certificate only if you trust the VPN endpoint.
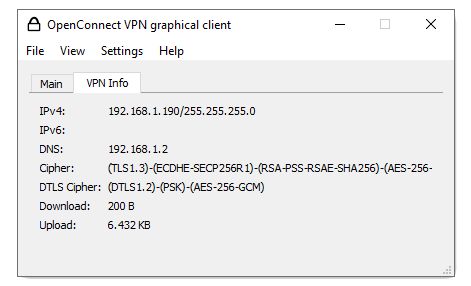
- After successful connection, open the VPN Info tab to review assigned IP address, DNS servers, and encryption details.
- Use the system tray icon to reconnect quickly or switch between saved profiles.
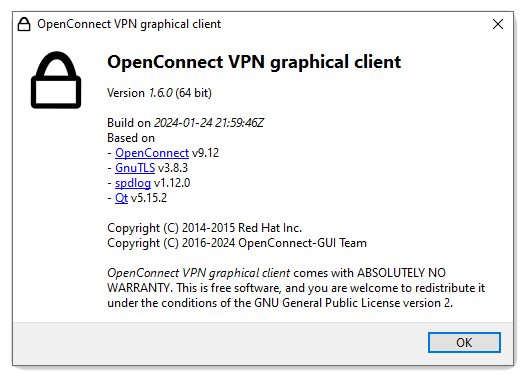
- Open the About window to verify version and license information.

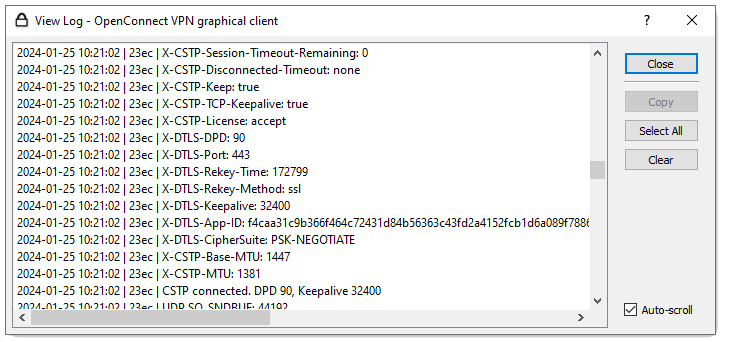
- Use the log window to diagnose connection failures or unexpected disconnects. Logs are often required by administrators for troubleshooting.
Security and Usage Tips
- Use Save & Connect to speed up future connections.
- If MFA is enabled, be prepared to enter a one-time code during login.
- Always verify VPN certificates before accepting them.
- Disconnect the VPN when it is no longer needed to reduce attack surface.
Common Issues and Troubleshooting
- Connection fails immediately: verify server address and protocol.
- MFA prompt not appearing: check log window for authentication errors.
- DNS not working: review VPN Info tab and system DNS configuration.
- Frequent disconnects: inspect logs and consult your administrator.
FAQ
Is OpenConnect GUI free?
Yes. OpenConnect GUI is free and based on open-source OpenConnect technology.
Can it replace Cisco AnyConnect?
In many environments, yes. Compatibility depends on server configuration and authentication methods.
Does OpenConnect GUI support MFA?
Yes. MFA prompts are supported when configured on the VPN server.
Is OpenConnect GUI safe to use?
When used with trusted servers and verified certificates, it is considered safe.