Create Hiren’s BootCD USB with Rufus
Download Rufus from our Rufus page and download Hiren’s BootCD PE ISO from our Hiren’s BootCD page. This step-by-step guide with screenshots will show you how to create a bootable USB with Rufus and use Hiren’s BootCD PE for recovery and repair.
Requirements
- USB flash drive (8 GB or larger, all data will be erased)
HBCD_PE_x64.iso(Hiren’s BootCD PE image)- The latest version of Rufus
Step 1 — Launch Rufus
Insert your USB stick and run Rufus. Make sure the correct drive is listed under Device.
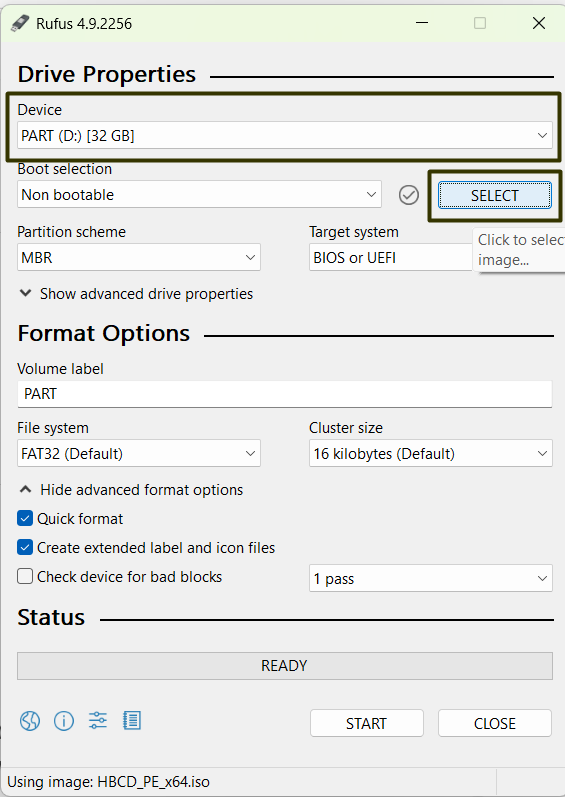
Step 2 — Select the Hiren’s BootCD ISO
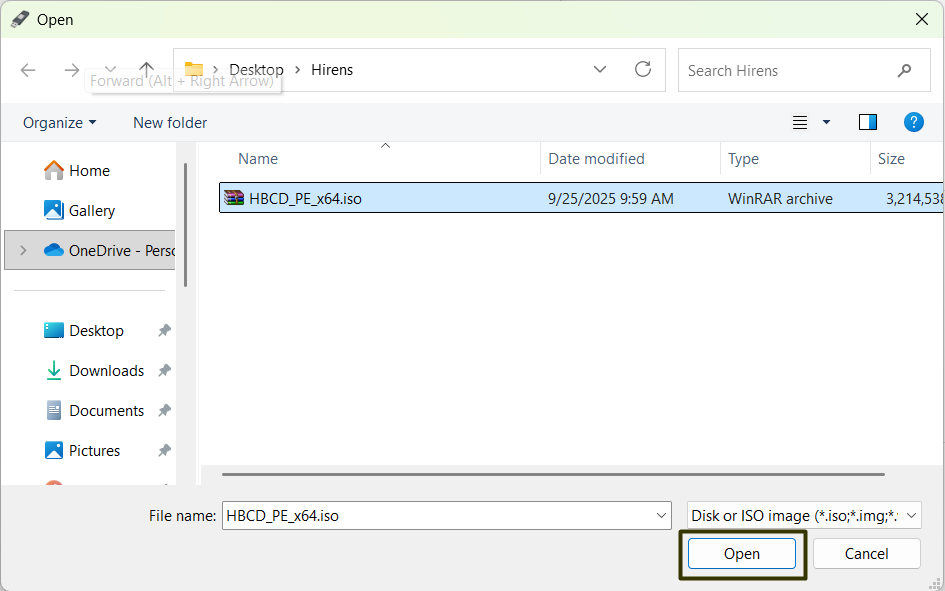
Click Select and browse to the HBCD_PE_x64.iso file.
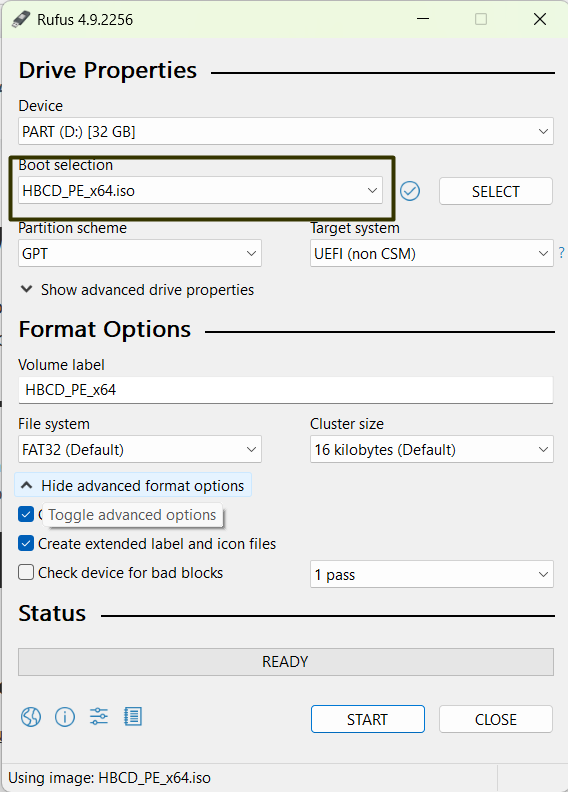
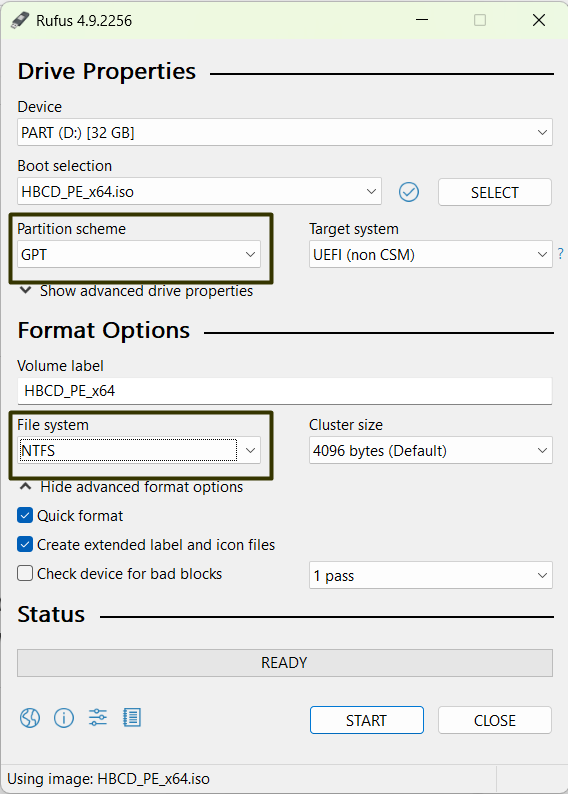
Step 3 — Configure Options
Rufus will auto-fill the settings, but it’s important to know what each means:
- Partition scheme:
- GPT — recommended for modern UEFI systems (2012+).
- MBR — for legacy BIOS systems or maximum compatibility.
- Target system:
- UEFI (non CSM) — use for most modern PCs.
- BIOS or UEFI — fallback for older hardware.
- File system:
- NTFS — best for large ISOs (>4 GB). Works for Hiren’s BootCD PE.
- FAT32 — maximum compatibility but 4 GB file size limit. Use if your system fails to boot from NTFS.
Recommended: GPT + UEFI + NTFS. If it doesn’t boot, rebuild the USB with MBR or FAT32.
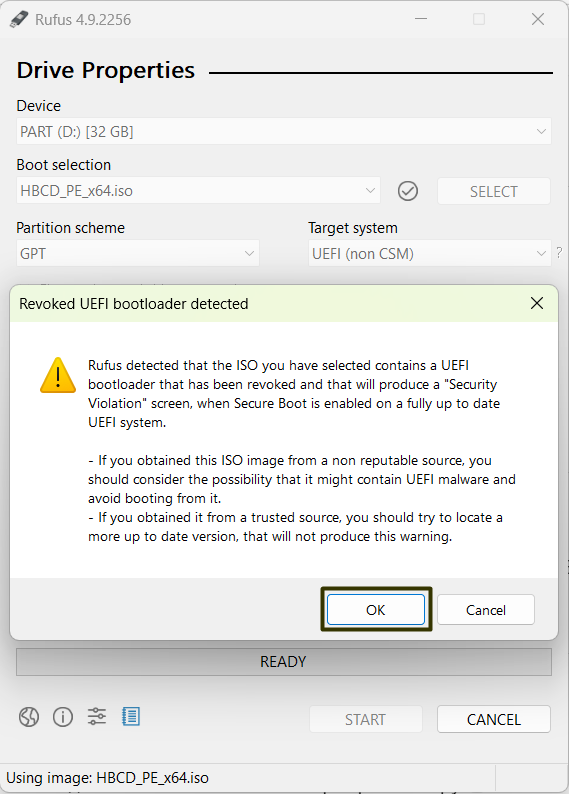
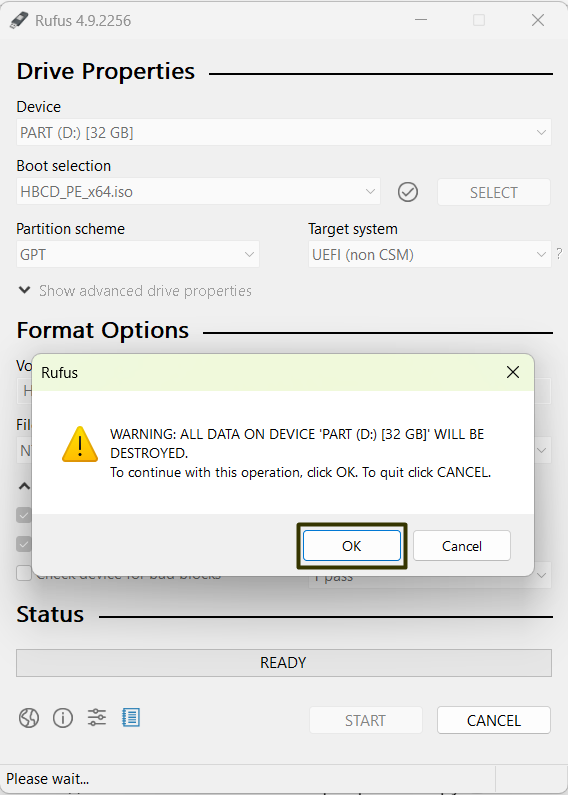
Step 4 — Handle Warnings
Click Start. Rufus may show two warnings:
- UEFI bootloader warning: Some ISOs (like Hiren’s PE) use bootloaders flagged by Secure Boot. Press OK and remember to disable Secure Boot in BIOS if needed.
- Data loss warning: Rufus reminds you that all data on the USB will be erased. Press OK to proceed.
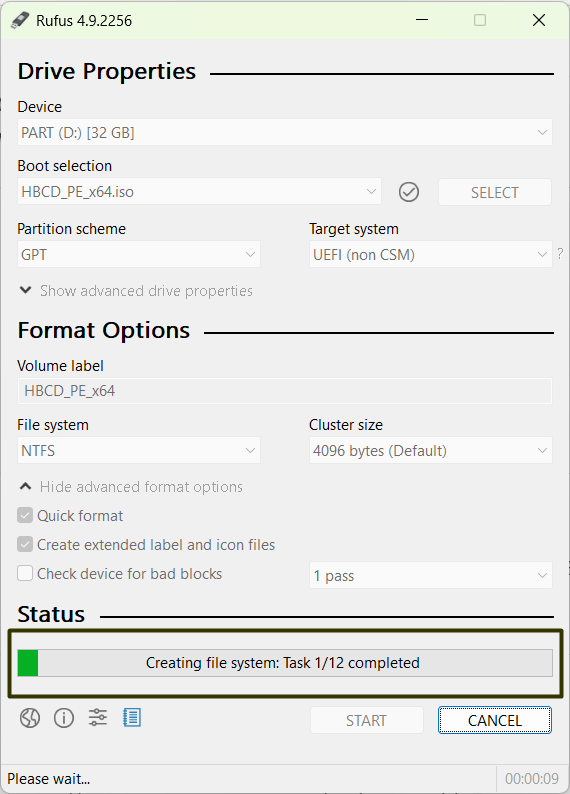
Step 5 — Writing Process
Rufus will now write the ISO to the USB stick. This usually takes 5–15 minutes, depending on the speed of your drive.
While you wait, explore more useful utilities in our software catalog.
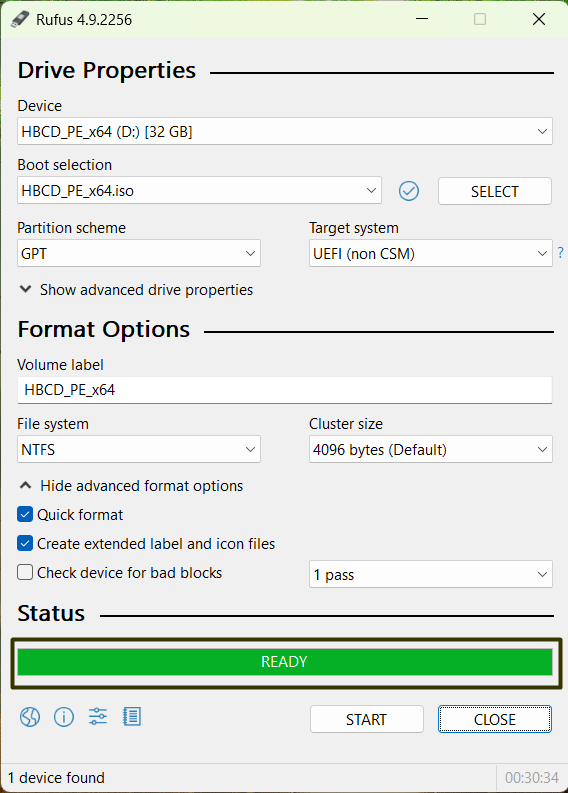
Step 6 — Completion
When the status shows READY in green, the bootable USB is finished. Close Rufus, safely eject your flash drive, and you’re ready to repair your PC.
Booting from the USB
Now boot your PC from the newly created USB drive:
- Enter BIOS/UEFI: Restart your computer and press the key shown on screen (
DEL,F2,ESC, orF12are most common). - Disable Secure Boot: In BIOS/UEFI, go to Boot or Security settings and set Secure Boot to Disabled. Some systems also require turning off Fast Boot.
- Set USB as the boot device: In Boot menu, choose your USB stick, or move it to the top of Boot Priority.
- Troubleshooting: If the USB doesn’t boot, recreate it using MBR instead of GPT, or FAT32 instead of NTFS.
Next steps
Once you boot into Hiren’s BootCD PE, you’ll have access to dozens of tools for backup, recovery, and diagnostics. Explore our programs catalog for even more utilities to maintain and repair your system.